FAQ
Everything you need to know to build your DIY wood-fired oven, choose the right mould, and get it done right.
Got Questions About Pizza Oven In A Box?
What Size DIY Pizza Oven Should I Build?
The size you choose depends on your available space, how many people you’re cooking for, and how often you plan to use your oven.
Our most popular sizes are the 800mm and 900mm — they offer the best balance between cooking space and performance.
What’s Included in the Pizza Oven Mould Kit?
What’s included in the pizza oven mould?
Flat-packed cardboard mould
Pre-cut door template
Instructions
What’s not included
All building materials are supplied separately.
What Base or Stand Do I Need for My DIY Pizza Oven?
What kind of base do I need?
Your finished oven will weigh over 500kg, so it needs a solid, level base.
A concrete slab is the best option, but a well-built base using bricks or concrete blocks also works well.
What to keep in mind
- Make sure your base is:
- Strong enough to support the full weight of the oven
- Level, so your build sits properly
- Built on firm ground to prevent sinking
Materials that work well
Concrete slab
Concrete blocks or besser blocks
Bricks or precast concrete
Other tips
Allow a bit of airflow where possible to reduce heat and moisture build-up.
Choose materials that can handle the weather, especially if your oven is exposed to sun and rain.
What is Refractory Cement for a DIY Wood-Fired Pizza Oven?
What is refractory cement?
Refractory cement is a heat-resistant material used to build the dome of your pizza oven.
It’s designed to handle very high temperatures (over 1000°C), so it won’t crack or break down like normal cement.
What’s in it?
You don’t need to overthink this, but good refractory cement typically includes:
Alumina – helps it handle extreme heat
Silica – gives it strength
Calcium aluminate – helps it set and bond properly
Simple way to think about it
It’s a ready-made mix designed specifically for high heat, so it’s the easiest and most reliable option for building your oven.
How Much Refractory Cement Do I Need? (25kg Bags)
700mm mould – 6 bags
800mm mould – 7 bags
900mm mould – 9 bags
1000mm mould – 10 bags
1100mm mould – 12 bags
Tip: Use any excess cement over the outside of the dome for extra strength.
What Tools and Materials Do I Need to Build a Pizza Oven?
Essentials
Masking tape – holds the mould together
Acrylic paint – seals the cardboard from moisture
Refractory cement – forms the main dome
Sand (brick or concrete) – for DIY mix if needed
Build & Structure
Chicken wire – strengthens the outer shell
Wire tie downs – keeps everything secure
Cooking Area
Fire bricks – cooking surface
Airflow & Access
6-inch flue – improves airflow
Metal door – helps retain heat
Insulation (Recommended)
Calcium silicate board – under floor insulation
Insulation blanket or loose fill – keeps heat in
Finishing
Fire cement – seals gaps and joins
Optional
Ash pit – easier clean-up
How Long Does It Take to Build a DIY Wood-Fired Pizza Oven?
Typical timeline
1–2 days – Prepare your slab or foundation
1–2 days – Build the base
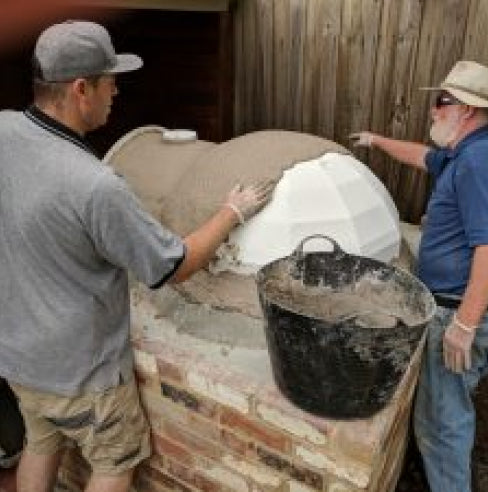
1 day – Apply the refractory cement over the mould
Then allow:
About 1 week – for outer layers or render (if adding)
1–2 weeks – for drying and curing
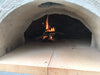
Curing fires
Once fully dry, start with small fires over several days, gradually increasing the heat.
Simple way to think about it
The build itself is quick.
The drying and curing is what takes time.
Why is it important to cure my pizza oven before using it?
Why is curing important?
Curing removes moisture trapped inside the oven.
If you heat it too quickly, that moisture turns to steam, which can cause cracking or damage.
Taking your time here makes a big difference to how well your oven performs long term.
How to cure your oven
After building, let the oven sit and air dry for at least 7 days.
Then begin a series of small fires, gradually increasing the temperature each day:
Day 1 – around 150°C
Day 2 – around 175°C
Day 3 – around 200°C
Day 4 – around 230°C
Day 5 – around 260°C
Simple way to think about it
Start low and go slow.
Why it matters
This gradual process allows moisture to escape safely, helping prevent cracks and ensuring your oven lasts.